COVID-19 SPECIAL
DIY fringe services
Experts share how you can keep yourself groomed at home during the circuit breaker period
SPH Brightcove Video

It is what many have been dreading: the curtailment of beauty, grooming and other non-essential services during the circuit breaker, which has been extended to June 1.
With even basic hair-cutting services suspended, at least until May 4, Singaporeans may have to get their grooming fix at home.
The Straits Times speaks to beauty experts for tips on surviving this period - or until your next appointment.
Cut your own hair
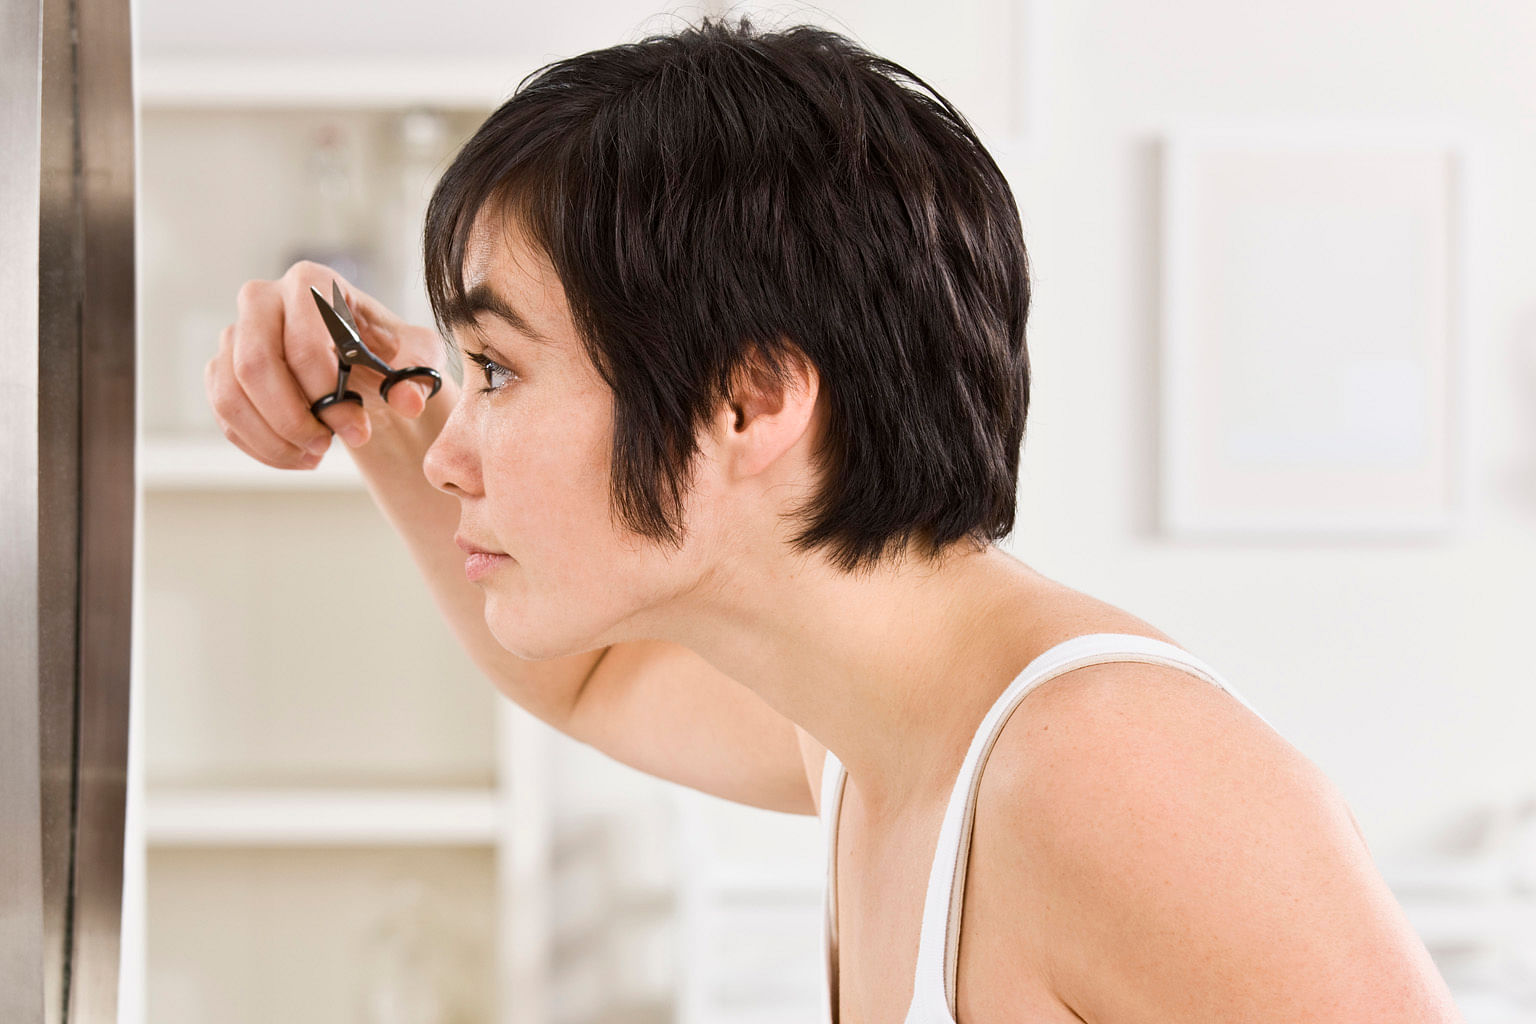
While hair experts recommend waiting until you can physically see your hairdresser for a chop, trimming the fringe is still manageable if you want to look presentable for conference calls.
Try to use hair scissors, which have finer blades; stationery or kitchen scissors, which are more blunt, should be a last resort.
Always cut hair with the scissors held vertically, a technique called point-cutting, says Ms Tien Goh, 39, education manager at Shiseido Professional.
When pulling your fringe forward to your nose to cut, the trick is not to tug too hard or hold it flat against the forehead.
"Most people hold the hair vertically down at a zero-degree angle and cut a straight line across, but that is very blunt and will look heavy," says Ms Goh.
"Instead, pull the hair out in front of you and hold it elevated at around a 30-degree angle, then cut a straight line. This will create a slightly layered effect with the inner hair being longer."
You can also cut in a zig-zag manner, suggest other hairdressers.
For a side-swept fringe, pull and cut in the opposite direction of where your fringe falls.
The hair furthest away from the eyebrow will be the shortest, after which you can sweep it back into place neatly. To touch up, cut a straight line across the ends towards the ear, she advises.
The rule of thumb is: "Don't cut to the length you want immediately - it's easier to keep taking away, but impossible to add on."
If you want to tackle more than a simple trim, proceed with caution.
For men, hair grows out quickest on the sides, says Ms Georgina Quek, a hairstylist at DuSol Beauty Korean Hair Salon.
If the thickness starts to bother you, try trimming with a razor, not scissors, adds Ms Quek, who taught her son how to cut his own hair when he enlisted in national service.
The most important thing is to have two mirrors, she says, one in front and the second, a vanity-sized one, to see the back of your head.
Clip or tie up hair on the crown of your head so you can focus on the sides.
Using the razor set on "3" or a higher-numbered clipper guard, shave from the ears upwards and outwards at a 45-degree angle, she says. It is not as close a shave, but reduces the risk of accidentally shaving a hole.
For added safety, shave against a comb. You can always bring the shaver down to a "2" or "1" for a tighter shave after that.
To tackle hair behind, do the same and go from the nape of the neck up, moving gradually across the head. After that, use a pair of scissors to tidy up.
Hair on top of the head is a little trickier. Ms Quek suggests pushing and holding the hair up before cutting cleanly across.
Wives wanting to help their husbands can use scissors to cut hair on top of the head in sections, each time adding more hair to the previous section as a guide to even out the length. This creates more varied layers as opposed to a blunt cut.
DYEING YOUR HAIR
If your grown-out roots are bothering you, you may want to experiment with home hair-dye kits. Always err on the side of going lighter than dark when choosing a colour, says Ms Goh.
It is harder for hairstylists to "fix" dark dyed hair at your next appointment as that will require bleaching. Steer away from buying the darkest colours on the hair colour chart. Most hairdressers will use shades like light brown, dark blonde or light blonde, she adds.
"In any case, consumer hair dye won't be that strong as it's not from a professional range."
To darken your hair, start from the crown of your head and work to the back (and ends, if you are attempting a full-head dye). Hair on the surface of our head is naturally lighter due to ultraviolet exposure, she explains, and this will give the hair dye time to process and deposit colour. This also works when covering up grey roots.
If you are lightening your hair, or "lifting", do the opposite. Start from the back where the hair is denser, coarser and needs more time to process the dye.
FAKE IT TILL YOU MAKE IT
If courage fails you, you can always wait it out. Ms Goh recommends using hair products to cheat and manipulate hair shape: hair masks or leave-in conditioner to hydrate and flatten puffy hair, and gel products for the men to reduce volume on the sides.
Ultimately, scalp care is the most important thing in the interim. Even if you are home all day, shampooing daily is a must, she says.
"Our weather is humid and hot and bacteria can breed on the scalp, which can cause pimples and dandruff."
Hardened sebum on the scalp can clog hair follicles and even lead to hair loss.
Women below 30 have oilier scalps and should pick a shampoo with a clear or translucent gel texture for more thorough cleansing, she says. For those above 40, expect to have drier scalps as there is less sebum secretion; a milky shampoo will hence be more nourishing.
"It's natural (for your hair) to have a little oil," Ms Goh assures.
Tame unruly brows
Are your overgrown brows getting you down? Well-maintained eyebrows can frame the face in place of make-up, especially for those quintessential conference calls. Tweezers and a pair of small scissors are all the tools you need to clean up unruly brow hairs.
Eyebrow specialist and make-up director Cecilia Chng recommends tweezing and trimming brows every two weeks to keep them tamed.
Using an eyebrow comb or spare spoolie, comb your brow hair downwards. Then, with the small scissors, trim the excess hair. Should there be any stray hairs, tweeze gently in the direction of hair growth.
"You can outline your desired brow shape with a brow pencil first, before trimming and tweezing," adds the industry veteran, who runs a boutique in Ngee Ann City. As with all DIY grooming, work slowly and "never overpluck".

Get your nails done
Take matters into your own hands, quite literally, by fixing your nails at home. Use this time to moisturise cuticles and nails with cuticle oil or coconut oil (above), says Ms Germaine Monteiro, co-founder of socially conscious nail salon The Nail Social.
"This will help keep them healthy and ready for when it's time to go back to your manicurist."
If you are itching for a splash of nail art, do it yourself with nail wraps from brands like Nailed It Wraps and Em.mezing Nails.
Easy to apply in 20 minutes, they come off as easily. Soak fingers in warm water for about eight minutes, then slowly peel the sticker off your nail bed upwards from the cuticles.
REMOVING GEL POLISH
If you want to remove grown-out gel nails, you need a nail file, cotton pads, aluminium foil cut into rectangles big enough to wrap around each finger and acetone. Here are the steps:
• Buff your fingernails with a nail file to remove the shiny coating of the gel polish.
• Tear a cotton pad in half and fold it so it is big enough to cover your nail. Soak the cotton in acetone fully.
• Place the soaked cotton on top of your nail and wrap your finger in aluminium foil to keep it in place. "Start with your non-dominant hand to make things easier," advises Ms Germaine Monteiro of The Nail Social.
• After 15 minutes, remove the foil on the finger you started with first. The gel polish should look as if it is falling off the nail and "lifted", and should be removable with little to no pressure. If not, soak for another five minutes and try again.
• Once all the gel nail polish has loosened, pull the foil off and use pressure to wipe off the gel. Any remaining gel can be gently lifted off the nail bed with a nail stick. If the polish is not lifting easily, you need more soaking. Rewrap with a new cotton pad and try again.
No acetone on hand? You can use regular nail polish remover with the same steps although the process will take longer, says Ms Monteiro.
"Instead of waiting 15 minutes with acetone, you probably have to check your progress after 20 minutes. It depends on the type of gel as well, so if it is still intact after 20 minutes, try resoaking until the gel falls off."
Related Stories


Join ST's Telegram channel and get the latest breaking news delivered to you.
A version of this article appeared in the print edition of The Straits Times on April 24, 2020, with the headline DIY fringe services. Subscribe